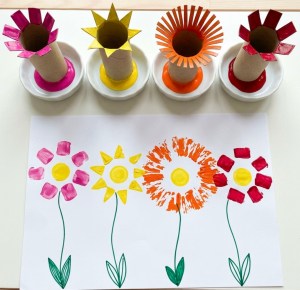
The children in my care adore flowers so I have been making flower themed activities and lesson plans all summer. See how I had them paint flowers with stamps made from cardboard rolls. It’s messy! Use craft mats and have paper towels close by!
See other activities I have done with the children including: pressed dried flower sun catchers; pressed flower clay ornaments and pendants; salt dough nature prints; “Planting a Rainbow” lesson plan; dried flowerValentine’s; pressed flower cards; tissue paper flowers; flowers made from paper plates; flowers made from cupcake liners; making flowers from Perler beads; and flowers made from coffee filters.
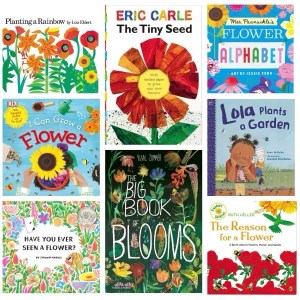
Be sure to read my favorite children’s books about flowers by clicking here.
What You Need:
Craft Mats or Plastic Tablecloth
Cardboard Rolls
Scissors
Washable Paint
Paper Plates or Paint Palletes
Painting Paper or White Cardstock
Green Marker, Paint, Paintbrush, or Cotton Swabs
What to Do:
1. Protect the Work Surface: Use craft mats or disposable tablecloth. Have paper towels close by
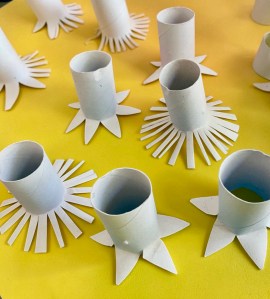
2. Cut the Petals: Use scissors to cut slits (about 1 to 2 inches deep) all around one end of the cardboard roll.
3. Bend Outward: Fold and flare the cut sections outward so they look like a blooming flower or star.
4. Venture Shapes: Trim the tips of the petals into triangles or curves to experiment with different flower petal shapes.
5. Pour the Paint: Squirt paint onto a flat paper plate or paint palettes and spread it out slightly.
6. Dip and Stamp: Press the flared cardboard end into the paint, ensuring all petals are coated, then stamp onto the paper.
7. Add Details: Once dry have the kids use markers, fingerprints, or cotton swabs to add stems, leaves, and centers to their painted flowers.
Photos by Stephanie Felzenberg
As an Amazon Influencer, I earn on qualifying purchases at no extra cost to you.


Leave a Reply