Rainbow Sun Catcher
Science Fun: Wednesday Projects
A long time ago, people referred to rainbows as magical bridges across the sky full of colors. Children and adults still find them quite magical today as well. Explain to the kids in your care that when the sun’s rays shine upon the raindrops they are refracted or “scattered” into the colors of the rainbow. The colors of the rainbow are always in the same order: red (on the outer edge), orange, yellow, green, blue, indigo, and violet. Every rainbow is a full circle which cannot be seen from the ground, but may be observed from an airplane. The center of the circle is always at a point in the sky opposite of the sun.
How to Make Rainbows: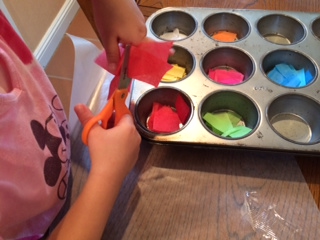
Glass Prisms: A prism is a transparent, solid glass, with three distinct ends. The prism separates white light passing through it into individual parts, the colors of the rainbow. Hold a prism to light and observe the colors. It will work best against a white background.
Mirror in Water: Place a small mirror in a glass or water. Place the glass of water so the sun will shine on the mirror. Turn the glass until the rainbow is reflected against the wall. Find the colors of the rainbow.
Mist from a Hose: Spray a fine mist of water from a hose. If weather permits, go outdoors and stand with your back to the sun. A rainbow will appear in the fine spray of the water.
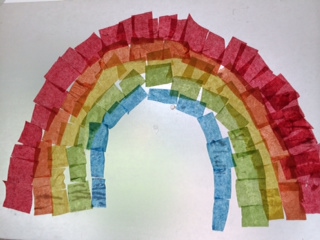
Rainbow Sun Catcher: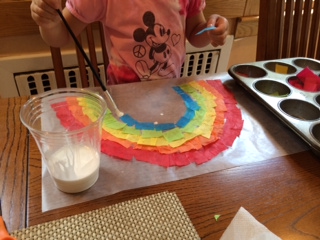
This is an easy craft kids will enjoy doing and it looks lovely to hang after they are finished. My four-year-old charge was able to do the cutting and gluing all by herself.
You Will Need:
Red, orange, yellow, green, blue, and violet tissue paper, cut into small rectangles
White craft glue
Disposable cup
Small paint brush
Waxed paper (about the size of regular printer paper)
Water
What to Do:
1. Cut rectangles out of colored tissue paper.
2. Make a mixture of half water and half glue in a disposable cup. Have the children dip the paintbrush into the glue mixture and form an arc for the rainbow on the waxed paper.
3. Starting with the red rectangles place flat tissue paper in the shape of an arc. It turns out better if the kids can keep the tissue paper flat and overlap them a little bit.
4. Continue with the other colors one row at a time in the correct color order (if possible) until the rainbow is complete.
5. After letting it dry, hang the picture in a window so the sunshine can catch the colors.
References:

Photos by Stephanie Felzenberg

Leave a comment