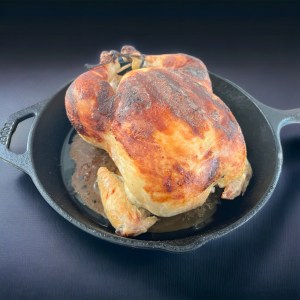
The family I work for introduced me to this absolutely amazing and easy chicken recipe from Samin Norat’s At the Kitchen Table web site that would make a great main dish for upcoming Rosh Hashanah celebration. The skin of the chicken always turns out golden and crispy and the meat is juicy and tender. If I bake it on a Monday or Tuesday I can use the cooked chicken later in the week for other recipes as well.
It’s the perfect recipe for Rosh Hashanah next week or any celebratory Jewish holiday.
You Will Need:
3 1/5 to 4 Pounds Chicken
Salt
2 1/2 Cups Buttermilk
Gallon Plastic Storage Bag
Butcher’s Twine
10-Inch Cast Iron Skillet
What to Do:
1. The day before you want to cook the chicken, remove the wingtips by cutting through the first wing joint with poultry shears or a sharp knife. Reserve for stock. Season it generously with salt and let it sit for 30 minutes.
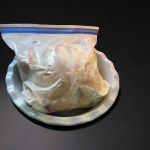
2. Stir 2 tablespoons of kosher salt or 4 tablespoons fine sea salt into the buttermilk to dissolve. Place the chicken in a gallon-size resealable plastic bag and pour in the buttermilk. If the chicken won’t fit in a gallon-size bag, double up two plastic produce bags to prevent leakage and tie the bag with a piece of twine.
3. Seal it, squish the buttermilk all around the chicken, place on a rimmed plate, and refrigerate. If you’re so inclined, over the next 24 hours you can turn the bag so every part of the chicken gets marinated, but that’s not essential.
4. Pull the chicken from the fridge an hour before you plan to cook it. Preheat the oven to 425°F, with a rack set in the centre position.
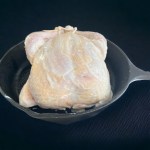
5. Remove the chicken from the plastic bag and scrape off as much buttermilk as you can without being obsessive. Tightly tie together the legs of the chicken with a piece of butcher’s twine. Place the chicken in a 10-inch cast iron skillet or shallow roasting pan.
6. Slide the pan all the way to the back of the oven on the centre rack. Rotate the pan so that the legs are pointing toward the rear left corner and the breast is pointing toward the centre of the oven (the back corners tend to be the hottest spots in the over, so this orientation protects the breast from overcooking before the legs are done). Pretty quickly you should hear the chicken sizzling.
7. After about 20 minutes, when the chicken starts to brown, reduce the heat to 400°F and continue roasting for 10 minutes and then move the pan so the legs are facing the back right corner of the oven.
8. Continue cooking for another 30 minutes or so, until the chicken is brown all over and the juices run clear when you insert a knife down to the bone between the leg and the thigh.
9. When the chicken’s done, remove it to a platter and let it rest for 10 minutes before carving.
As an Amazon Influencer I earn on qualifying purchases.
References:
Recipe from At the Kitchen Table
Photos by Stephanie Felzenberg

Leave a comment