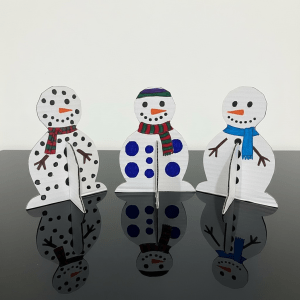
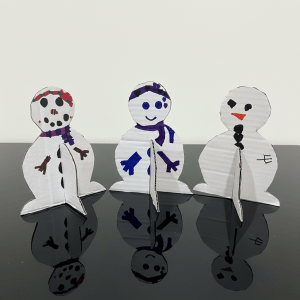
Decorating 3D cardboard snowmen is one of those activities children instantly fall in love with. From choosing silly smiles and colorful scarves to deciding where each button should go, kids get to express their creativity while building confidence and fine motor skills.
As a nanny, I love this activity because it keeps little hands busy, sparks imagination, and turns a simple craft into a snowman friend the children are proud to show off. Best of all, every snowman is unique just like the child who made it.
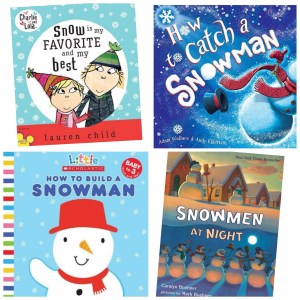
Don’t forget to read wonderful children’s books about snowmen while doing this simple project. I recommend, “Snowmen at Night” by Caralyn Buehner, “Charlie and Lola: Snow is My Favorite and My Best” by Lauren Child, “How to Catch a Snowman” by Adam Wallace, “How to Build a Snowman” by Scholastic.
You Will Need:
Snowman Template (we used one from Little Bins for Little Hands
Paper
Printer
Pencil
White Cardboard
Scissors and X-Acto Knife
Sharpie Markers or Sharpie Paint Pens
What to Do:
1. Print out a snowman template. I used a 3D paper card template for this project.
2. Cut out the template and use a pencil to trace it onto cardboard.
3. Cut out the snowman with a scissors and X-Acto Knife.
4. Allow the kids to decorate their snowman with Sharpie Markers or Sharpie Paint Pens.
5. Slide the cardboard snowman into the stand to display.
References:
Snowman Template from Little Bins for Little Hands
Photos by Stephanie Felzenberg
As an Amazon Influencer, I earn on qualifying purchases.

Leave a comment