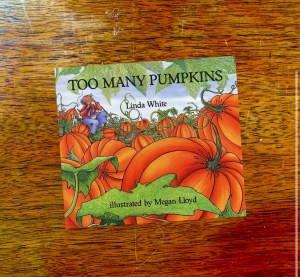
It’s pumpkin season! I used an orange marker to make dashes on orange paper for the kids to practice using their scissor skills. Then, we made these little pumpkins with the orange strips of paper. Be sure to read “Too Many Pumpkins” by Linda White with the children while they make these pumpkins.
You Will Need:
Orange and Green Paper
Orange and Black Markers
Safety Scissors
Two Split Pins
Ruler or Straight Edge
What to Do:
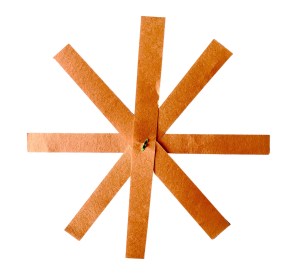
1. Use a ruler to mark out eight strips lengthwise, using a dashed straight lines to show where the child needs to cut. If you use a darker orange marker pen you’ll be able to see the lines to cut them, but they won’t show every much in your finished craft. Eight strips of paper will make two pumpkins.
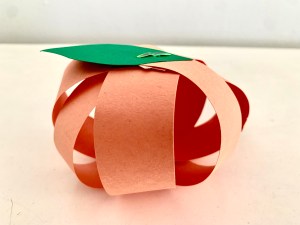
2. Once cut out, place four orange strips in an circular arrangement, (as pictured), and hold them in the event together using a split pin. Your child might find it easier if you poke through the ends of all the strips with a sharp pencil or craft knife first, and then your child can thread the pieces on to the split pin.
3. Then you need to repeat this threading, gathering together all the opposite ends of the strips of card to form your 3D pumpkin shape. Use a second split pin to hold them in place, adding a piece of green paper on the top to make a stalk or leaf.
4. The child can use a marker to design a jack-o-lantern face on the pumpkin if they want to.
I may make a small profit when visitors purchase items using the affiliate links on this blog post and on my storefront. As an Amazon Influencer, I earn from qualifying purchases.

Leave a comment